2–3 minute read
Planting times and spacing
The ideal spacing varies depending on your garden style (victory vs. intensive) and whether disease is an issue for the crop in question. Closer spacing rapidly shades out weeds, but good air circulation is important for minimizing fungal diseases. Suggested spacing is listed in the publications for each style of garden.
- Central NC Planting Calendar for Annual Vegetables, Fruits, and Herbs
- Vegetable Planting Guide: Piedmont & coastal plain
nice easy-to-read guide, good graphics, designed for schools
Vegetable Calendar
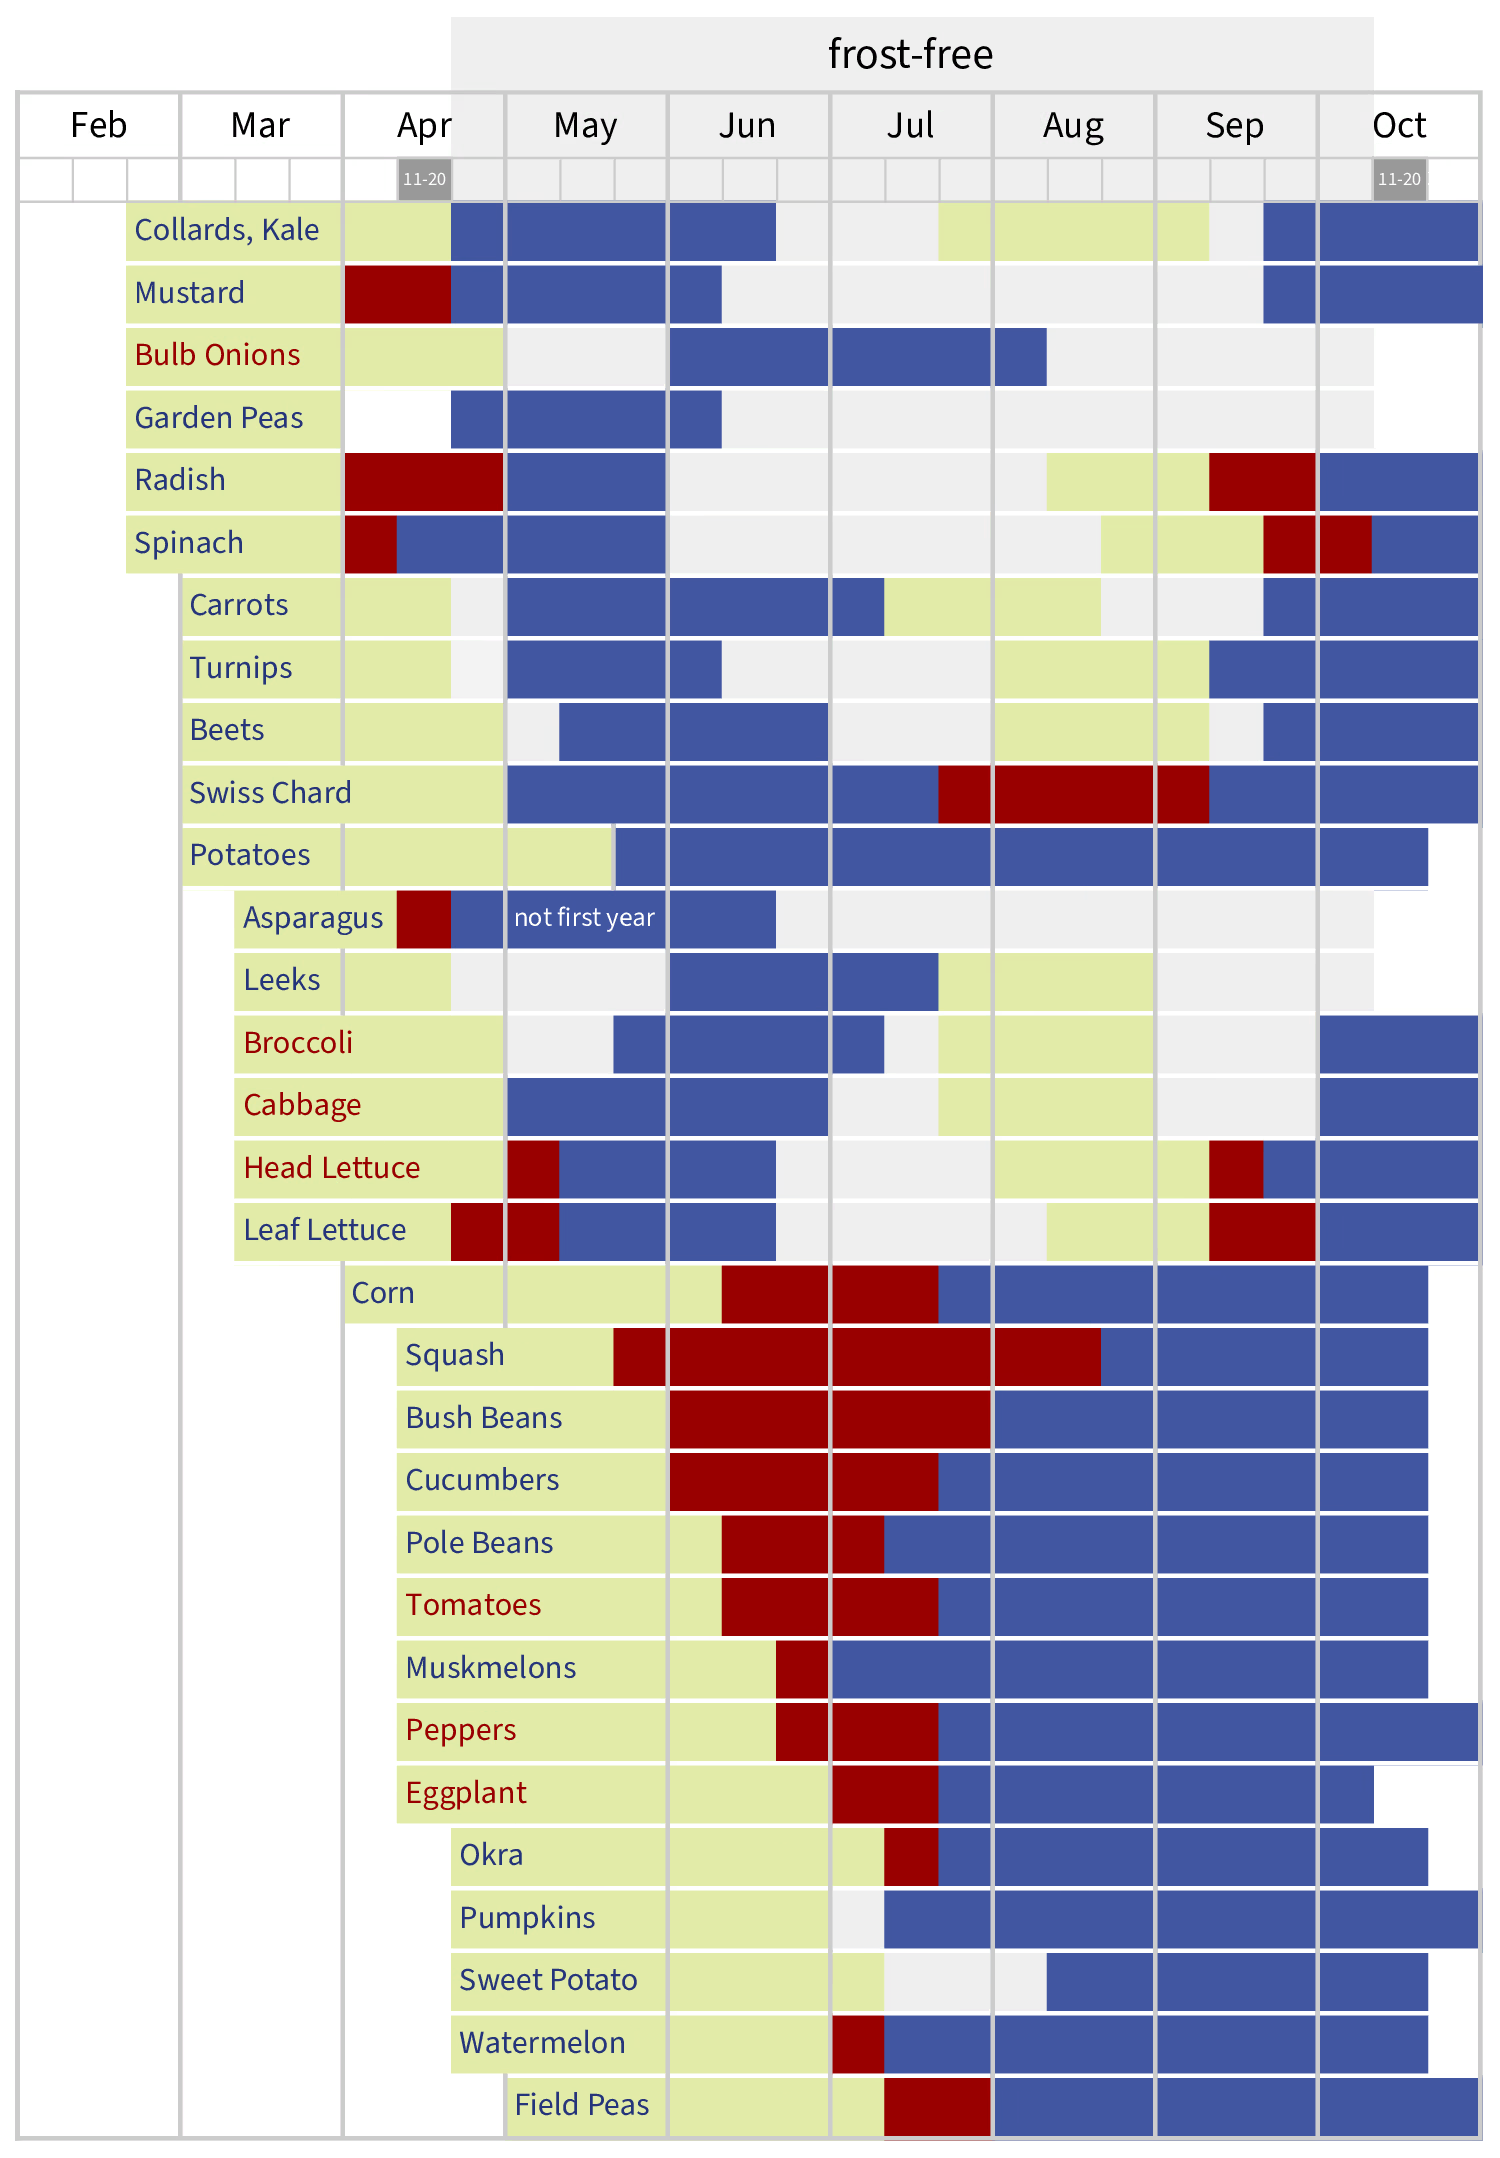
The chart below uses 10-day intervals based on our Orange County frost dates. We use conservative frost date ranges of April 11–20 and October 11–20, meaning that there is only a ten percent chance of a later spring frost or earlier fall frost. Planting in the middle of a vegetable’s date range is the most reliable choice.

Selecting plants
Transplants
It is more convenient to purchase plants for transplanting, and almost all vegetables are suitable for transplanting, even beets. The best plants for transplanting are not necessarily the largest and tallest ones. Good quality transplants should be stocky with a healthy appearance, be of medium size, have a good green color, be free from insects and diseases and have good roots. Avoid plants that have started to flower, because this places the plant under stress. Farmers’ markets can be a good source for locally-adapted varieties. Transplants have several advantages over seed:
- greater slug-resistance
- effectively earlier start to the growing season
- greater competitiveness with weed seeds
Seeds
Seeds offer a greater variety and reduced expense. If you choose seed, it is easier to plant large ones, such as peas, beans, radishes or turnips, individually. Use strips impregnated with seed for small seeds. Be sure to plant at the proper depth and keep the soil moist until germination.
Planting
To prevent wilting, transplant on a cloudy day or in the early evening. Thoroughly water your plants 1–2 hours prior to transplanting.
- Dig a hole large enough to accommodate the root ball. Plant a little deeper than the soil level in the container except for tomatoes. Tomatoes will develop roots all along the stems and should be planted deep enough to leave only 2–3 sets of leaves exposed.
 NCSU: Home Vegetable gardening
 - Handle plants carefully to avoid disturbing the roots and bruising the stem. Despite the instructions on your plant, it is best to remove peat or fiber pots before transplanting. Gently tease the roots to unwind them if the plant is pot-bound, and trim any long ends with sharp scissors.
- Apply a starter fertilizer solution to help the plants overcome transplant shock and to ensure proper fertility during the initial growth period. A starter solution is a water-soluble fertilizer high in phosphorus content, with a formulation such as 10-52-17. Mix the fertilizer with water at the rate of 2 tablespoons per gallon. As you set the plant in the soil, pour 1 cup of the solution around the roots, then finish filling the hole with soil.
Protect young transplants against heat, cold, and damaging winds for the first 2–4 days. You can place boxes, baskets, plastic milk jugs, or flower pots over the transplants if the weather mandates protection, but do not leave them any longer than necessary. If it gets warm during the day, remove the protectors to provide proper ventilation. A shingle stuck in the ground at a slant on the south side of a plant can serve as a sunshade.
